Showing posts with label Winter of Discontent. Show all posts

Sunday, 12 April 2020

Bloody Barons - Bloody Brilliant

As alluded to in previous posts, one of my back burner projects is a refresh of my 10 mm WOTR armies. They are based for Bloody Barons which up until now were still my favourite medieval set. Now with the release of version 2, or more correctly, 'Wars of the Roses. The Bloody Barons', its time to take another look.

I was quite excited by the prospect as this new version claims to be a proper army level game and is played on a large grid - the playing area consists of 16 zones arranged into a 4 by 4 grid. This gives a 4 foot by 3 foot table, which just happens to be the size of my new table - happy days!
The rules are less focused on individual units but more about centre, left and right wing; in medieval parlance battles or wards. This is similar in concept to my favourite ancients game, 'Lost Battles', so I was keen to give it a go.

So the first step is to ascertain whether I have all the necessary figures. After a review of army size both for pick up games and historical scenarios it seems that the new version is potentially a bit more demanding in that it uses slightly more units. However, this version has suggestions for different unit sizes and is really quite flexible in that respect. A typical version one unit would be in the region of 8 bases (this was variable). In this version all units are the same size and consist of 8 'increments' but are deemed to be made up of 4 bases. In the 'popular' configuration' a unit is 4 bases and loses casualties by the half base. An alternative for wealthy players (as the rules deem it) is to use 8 actual bases but counting each one as a half base. It is this latter 'wealthy' configuration that tallies best with my version one armies. After a review of the scenario requirements it seems I have enough figures for most of the battles except the biggies, such as Towton. However, with my current basing system I have the option of using the 'popular' scale, in which case I have more than enough figures.

So, having decided that I would quite like to keep my basing system, the next step was to play through a game and see how this impacts upon the practicalities of game play.
The rules give examples of armies of different sizes both at the standard game size of 40 points and a small game size at 22 points. I chose to field two identical armies using what the rules term the 'normal' army, as opposed to a high quality army of less units or a poor quality army of more units.

Example Normal army
2 household foot units = 8
8 retinue foot units = 28
3 levy foot units = 3
1 light gun =1
Total 40 points. 104 (or 52) bases + 3 generals and a gun model

For simplicity, I wanted to restrict this first game to infantry only, so left out the guns. I also reduced both armies by a single retinue unit for figure usage reasons; even so I needed to use crossbows and a handgunner base to make up numbers. This is actually a plus, as the game doesn't differentiate between base types; archers, bills or crossbow it matters naught. The only differentiation is by quality; household, retinue or levy. This of course is really versatile when it comes to putting together armies from existing figure collections.
Hence, for this game both sides came in at 12  units costing 36 points. I will refer to them as the northern army or southern army depending on which table edge they occupied.

The Armies assemble - about 1200 figures


Having built the armies, the next step is to choose the terrain (or scenery as the rules call it). A standard pick up game will have 7 pieces of scenery. The first 3 are compulsory and consist of a gentle hill, boggy ground and buildings (or a wood). Both players then choose 2 (differing) items from the following: gentle hill, rough hill, hedge or ditch, stream.

In reality I was limited by my available terrain so ended up with a wood, a gentle hill and marsh plus 2 hedges, a stream and a rough hill.

The Scenery items


The next step is to roll for General's attributes. These can be:
Assaulter (A) - confers advantages when assaulting
Target (T) - confers advantages when being assaulted
Unreliable (U) - nuff said
Morale (M)- confers advantages in morale tests

After the dice rolls the attributes were deemed to be as follows:
Northern army CinC AT, 2nd general A, 3rd general M
Southern army CinC A, 2nd general T, 3rd general A

The next step is to determine the roles of attacker and defender. This is carried out using a quick little dice game (quaintly called the piggy chase). The winner of this is deemed the attacker and, as is common in other Peter Pig games, the defender suffers losses before the game start. The severity of the loss depends upon how well they did in the piggy chase. In this case the northern army would be defending and had level 3 losses (levels are 1 to 4 with the lower numbers being worse).

Next the scenery is placed. This is done by placing pieces alternately with the defender placing the first piece. The corner zones are filled before centre zones. Once placed, both sides have a limited chance to adjust the position of scenery.

Initial Scenery placement

Final Terrain. Note the stream. The stream is only considered an obstacle in the Stream zone - here denoted by the stream side vegetation.

Next, both sides may note down a zone which may be moved forward after deployment. The southern army chose to advance their right flank zone, whilst the northerners chose their right centre.

Both armies then deploy with the defender going first. Each base edge zone must contain a unit and the maximum capacity of a zone is 3 units. The southern attackers chose to spread their levy units over several zones, whereas the northerners chose to mass most of their Levy on their right flank behind woods.


The defender's losses are then determined. The northerners lost 3 half bases of Levy and  6 Retinue. Also all 3 Levy units failed to arrive and were placed in the off table reinforcements area. (A maximum of 3 units can be lost in his way).

Deployment before Defender's losses or advancing zones


After this the pre-selected zones are advanced.

Finally, the scenario events are carried out. Both sides have 26 dice to assign to four scenario categories. (Bloody Barons ver. 1 had a similar pre-game with 11 categories including determining attacker and defender). Players then 'dice off' to see who has the advantage in each of these categories. In this case the results were as follows:

Ambition and Title Defender wins by 1 - add an attribute to general. The T attribute was added to general 2.
Battle Craft and Reputation Attacker wins by 2. Put an enemy unit into the reinforcements area. Chose to remove the last unit from defender's right flank (2 levy units had already been placed into the reinforcements area through defender's losses). Ouch.
Chance and Happenstance Defender wins by 1. Change a gentle hill to a rough hill.
Deviousness and Politic A draw.

So their we have it, all the pregame stuff done and we're ready for the off. The pre-game in version one was always great fun but did tend to take a long time. It remains to be seen if this is any quicker. It does seem to have been slimmed down but the first time through is always slow and I'm playing solo. The essential flavour of the original rules is still there, albeit with a slightly different focus.

So onto the game with the defender going first. I shall describe the play sequence but won't go through blow by blow; hopefully the pictures will speak for themselves. I will say, however, that after the initial run through I picked up the mechanisms very quick and the battle rules are very slick. The turn sequence is handy to refer to but most of the rules can be remembered pretty easily after a couple of turns.

Turn Sequence
1) General's actions - essentially moving and attaching / un-attaching to units.
2) Morale - any Wards (zones) containing casualty markers takes morale.
3) Cavalry Phase (not used in this playtest)
4) Pulling units in - essentially a chance to adjust which zone single units occupy
5) Active player shoots
6) Active player moves Wards
7) Melee
8) Both players attempt to remove low on arrows markers
9) Both players attempt to restore order to single units
10) Restore Wards. A chance to regain casualties if not in contact.
11) Both players attempt to load guns (not used this playtest)
12) Arrivals - units in reinforcement area attempt to arrive
13 Battle clock - D6 Battle lasts up to 32.

End of Turn One. Attacker's left centre in some disorder. Defender late arrivals start to trickle in from behind wood.
End of Turn Two. Attacker's push on the right. Disordered by shooting crossing the stream.
End of Turn Three (getting late, hence the change of light!). Red markers show 'Winning the Fight'
Turn Four. Defenders concede when both flanks shattered.

All in all I'm very impressed with the rules and they do seem to reflect the level of command they are pitched at. For me, highlights are:
1) No formations - units are either 'Ordered' (in battle line) or 'Out of Order'. [Personally I would have gone for something like arrayed and disarrayed but hey ho].
2) Focus on Wards - shooting, morale and melee is done by Ward not individual units.
3) Morale effect - most troops are lost by single bases sloping off with only the odd unit legging it.
4) Combat outcome - very easy to remember and intuitive.
5) Generals. - the mechanisms for generals is very clever. They have a real effect with the mechanisms being almost invisible. General's attributes aside, they act by attaching to units and raising the quality of that unit. This has knock on effects in morale, shooting and melee.

As I said I'm very impressed with these so far. I already have ideas for upgrading my terrain, a big rebase and touch up of the paint work and even adding a few more figures. Then there's that long dreamed of Kingmaker campaign.........

Wednesday, 12 September 2018

Winter of Discontent. Part three. For, Lords, To-morrow is a Busy Day


For, Lords, To-morrow is a Busy Day


For this test I used the same scenario, the Battle of Newark, as I used for the Tree of Battles game. This immediately highlighted a key difference between the two rulesets; ‘To-morrow is a Busy Day’ doesn’t really translate very well to scenarios. Now don’t get me wrong, it’s perfectly doable but a large proportion of the rules are dedicated to generating pick-up games. It’s a very innovative system but it is a bit quirky. Under most other rules systems the size and composition of your army will no doubt influence your deployment and tactics in the game. However, in ‘To-morrow is a Busy Day’, it is the other way around. You have a number of ‘strategy cards’ from which you select your preferred plan. The chosen card will have not only a prescribed deployment but an army composition on it. This will tell you the number and type of contingents that you have plus how they are divided into battles. After that you then dice to see the size of your individual contingents.

For this game I would have to miss out all the strategy card element and just use the same number and type of contingents as the last battle. I did however dice for the size of the contingents. There are three sizes of battles catered for, each differing only in the size of the contingents used. These are designated as Hastily Raised, Full Array and Epic Host. Typical contingent sizes, in terms of the number of bases, are 5 to 7, 8 to 11 and 11 to 16 respectively. I chose the Hastily Raised option as being more in line with the original scenario.
Another difference is in the number of leaders employed; in ‘To-morrow is a Busy Day’, the number of available leaders is randomly generated and the leaders of the battles are chosen from these. As I was only deploying 2 battles, rather than the traditional three, I only used 2/3 of the dice generated leaders, giving 3 leaders each. Fortuitously, the Yorkists diced up King Edward and the Duke of Gloucester, as per the original scenario, but this time they were joined by Norfolk. For the Lancastrians I diced up: Somerset, Clifford and Oxford. The rules place the leaders in order of seniority, so this time the 2 Lancastrian Battles would be led by Somerset and Clifford.
Now the armies were all set it was time to deploy. If playing against an opponent, deployment is carried out by each player alternately placing a battle. Battles start in bow range of the enemy, which is defined as 3 or 4 handspans! There is no indication of what you do with the leaders at this stage, so I simply attached them to contingents in their own battle.
The armies deploy

After deployment you now determine the ‘Combat Effectiveness’ of each contingent by rolling an average die. Combat Effectiveness is something of a misnomer as it doesn’t seem to affect either shooting or melee. However, it is an indication of morale; if it reaches 1 the contingent cannot advance and if it falls to zero then the contingent flees.
Its now that the rules get surprisingly vague. After a relatively detailed explanation of how to generate battles, lasting several pages, there is no real guide on how to actually play the game. There is a section headed ‘Turn Sequence’ that is noteworthy for not actually describing a turn sequence at all. All I could infer from this section is that there would be an archery duel until one side decided to attack and close combat would then follow. I’m not at all sure how you’re meant to do this; alternately by battle as in the deployment phase, simultaneously or alternate in an IGOUGO fashion? In the end I just decided the order in which each battle would take its turn by a random die roll.

So it’s on to the shooting phase. Each contingent containing missile troops has four good shots before it runs low on arrows and can shoot twice per turn. Hence, I decided to take two turns of shooting before attacking with the Yorkists. As troops start the game in bow range there is no measuring and the shooting procedure is quite straight forward. You roll a D10, add a few modifiers and then read off the result from a chart. Results are given with a colourful descriptor such as visible damage, enemy hurt badly or withering fire. In game terms this can result in the enemy losing a base or losing a point of combat effectiveness. A good shot can also give you a +1 modifier on your next shot. Conversely a bad shot can give you a negative modifier. 

The end of the archery duel
So after 2 turns of shooting the Lancastrians had come off worst with several contingents dangerously low on Combat Effectiveness (CE). By contrast some of the Yorkist contingents had actually gone up in CE. As both sides were now low on arrows it was time for the Yorkists to attack. The attacking side normally has to endure 2 shots as it closes in – one at effective range and one at point blank. However, with a -3 modifier for being low on arrows this was not likely to be effective. Moving into combat was simple as there aren’t any movement rules as such, instead you just move them into contact. 
The Yorkists attack - King Edward in reserve
 Combat is similar to shooting, i.e. a D10 plus modifiers. However, this time leaders can choose to lead from the front and add their leadership value to the total. Again combat results are given with a descriptor such as gaining upper hand, enemy pushed back or enemy faltering. The actual game effect of these various combat results is similar to archery with a range of fleeing bases, decreases in combat effectiveness or modifiers to the next round of combat.

On the Yorkist right flank the mercenaries were quite effective due to a +3 modifier for pikes at first contact plus an extra +1 for supported by handgunners. This resulted in them pushing the Lancastrians back up the hill.
On the opposite flank, the Lancastrian contingent led by Clifford was down to a CE of 1. A good attack from Norfolk saw this drop to zero and the contingent routed. Combat effectiveness is also affected by seeing adjacent friends flee so the neighbouring contingent dropped 2CE and also routed. Both victorious Yorkist contingents were forced to pursue – also leaving the field. However, they did still have the mercenary pike on the field plus King Edwards contingent in reserve.
However, I decided to leave it there as the Lancastrians only had one remaining contingent and that was down to a CE of one.


Endgame - the Lancastrians flee

In summary the battle only lasted for 3 turns and two of those were archery. With no measurement involved it was all very quick. Granted this was a very small encounter with 3 or 4 contingents aside as opposed to the more typical 10. However, I’m not convinced that more contingents would have made much difference. Perhaps I need to try a bigger game? The rules also imply that more stands in a contingent makes them more resilient however as the size doesn’t alter the combat effectiveness I don’t see how this works. Perhaps I’m missing something.
The verdict – the jury’s out on this one; more testing needed I think. However, my gut feeling is that there are some very innovative ideas but it doesn’t quite work. The lack of movement rules, in particular, would seem to prevent using them for anything other than a stylised head on fight. On the plus side I can see how these would be great for solo play where it’s really the narrative that counts. Conversely, I think they’re altogether a bit vague for playing against an opponent.

Tuesday, 11 September 2018

Winter of Discontent. Part Two - The Tree of Battles


The Tree of Battles


The first step in my WOTR project is to take a look at some alternative rulesets to our old faithful ‘Bloody Barons’.
I’ve decided to begin with Simon MacDowall’s ‘The Tree of Battles.’ This set is subtitled ‘European Warfare AD 1300 – 1500’ and the author claims to ‘…have taken care to ensure that these rules work particularly well for the Hundred Years War and Wars of the Roses.’ Sounds ideal then.
The rules are actually an adaptation of the author’s Dark Age ruleset, ‘Comitatus’. I have in fact played a couple of games of the latter and did toy with the idea of using them for my own Dark Age project, although his ‘Shieldwall’ variant may be more appropriate for my purposes. That aside, many of the mechanisms are common to both which is a promising start as I quite liked ‘Comitatus’.
To test out the rules I decided to play the scenario which is available on the author’s blog – ‘The Battle of Newark, 1471’. This is a fictitious, what-if, type scenario and the only published Tree of Battles scenario of which I am aware. For this I needed to organise my figure collection into 2 armies. This was relatively straight forward as the rules deal with figure bases (or stands as the rules term them) and not individual figures. As with many modern rule sets, base sizes are not critical, as long as both sides’ bases have the same frontage. Recommended sizes are a 20 mm frontage for 6 mm scale figures and 40 mm frontage for 15mm scale figures. Fortuitously my 10 mm scale bases, at 30 mm frontage, fall nicely in this range.
All the usual troop types are catered for and the scenario calls for Men at Arms, Archers, Billmen, Pikemen, Handgunners, Scourers and Artillery. The scenario lists what type of stands are available and the player picks a certain number from the list (25 stands for Yorkists and 20 for Lancastrians). Normally stands are grouped with others of the same type to form contingents; although mixed contingents, of bow and bill for instance, are allowed. The contingent is the smallest independent unit in the rules. Oddly the rules don’t seem to give any indication of how big a contingent should be but, reading between the lines and using the scenario orders of battle, I settled on between 4 and 6 stands. Contingents are then assigned to ‘Battles’; three being the normal number but, as a small encounter, this scenario calls for two each. Each battle is commanded by a ‘Captain’ and the senior Captain is also the army commander or ‘Marshal of the Host’.
For my game the armies were as follows:
Yorkists
King Edward IV (Marshal of the Host)
Retinue 2 Stands Men at Arms, A class (Edwards’s personal troops)
Retainers 2 mixed contingents (each 3 stands archers and 3 stands billmen, B class)
Richard Duke of Gloucester
Retinue 1 Stand Men at Arms, A class (Gloucester’s personal troops)
Midlanders 1 mixed contingent (2 stands archers and 2 stands billmen, C class)
Flemish Mercenaries (2 Stands Handgunners and 4 Stands Pikemen, B class)
Lancastrians
John de Vere, Earl of Oxford (Marshal of the Host)
Retinue 1 Stand Men at Arms, A class (Oxford’s personal troops)
Retainers 1 mixed contingent (each 3 stands archers and 3 stands billmen, B class)
Henry Holland, Duke of Exeter
Retinue 1 Stand Men at Arms, A class (Exeter’s personal troops)
East Anglians 2 mixed contingents (each 3 stands archers and 3 stands billmen, C class)

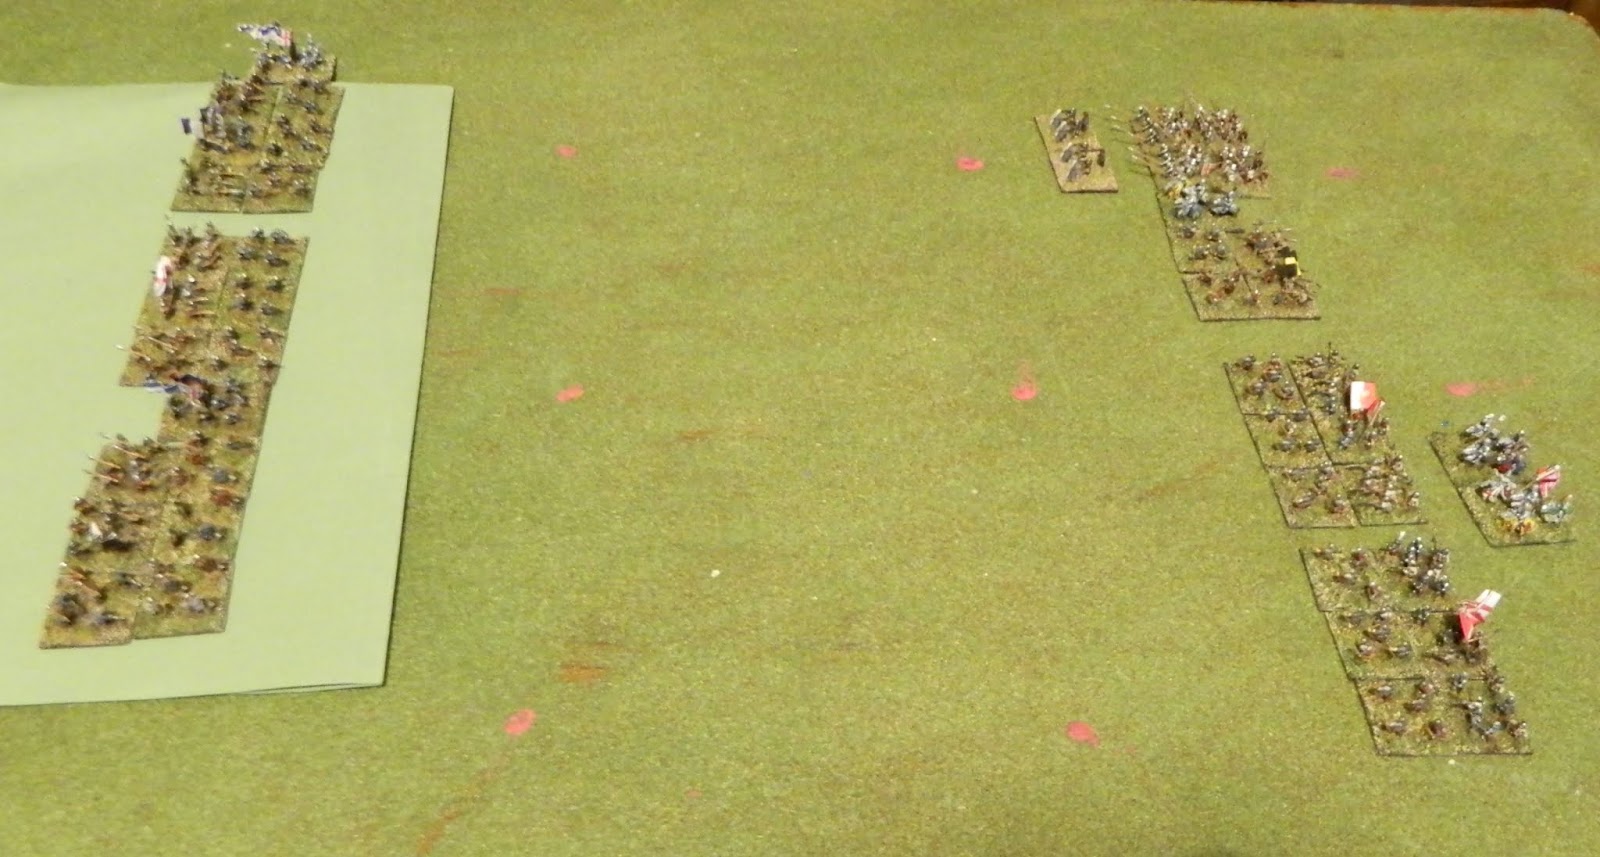
The game was played, lengthwise, on a two by four foot table. I didn’t use any terrain other than a large hill on the Lancastrian side (as this was just a test I used a large piece of green card for this). My idea was that the Lancastrians would hold the hill and the Yorkists would advance to the attack. I diced for the relative position of the battles within each army and in both cases the Marshals took the leftmost battle. The rules require that each captain is given an order (chosen from Hold, Advance or Attack) and must test to see if they obey them. I gave Exeter a Hold order and Gloucester an Attack order; predictably both disobeyed with Gloucester reverting to Hold and Exeter Advancing!

The Armies Deploy - Lancastrians on the oddly square 'hill'!

Exeter prepares to advance - contrary to orders

There are three movement zones in the game; essentially outside bow range, inside bow range and up close and personal. Outside bow range, units may make march or approach moves. Inside bow range, units make tactical moves but cannot approach closer than a base width to the enemy. The latter can only be entered by a charge into close combat. There is a random element to tactical moves; the move distance being governed by a die roll. Any 5s or 6s rolled resulting in a Disorder point. The constituent contingents of a battle are also encouraged to move together; troops not so ‘embattled’ are subject to a control test.
The concept of Disorder points (or Death, Disorder and Desertion Points to give them their full name) is crucial to the game. Disorder points may be accrued for moving too fast or through difficult terrain; receiving heavy casualties from shooting or melee; or from morale issues such as seeing friends flee etc. They may be removed by resting or by a Captain using a ‘Steady Troops’ action. If a contingent acquires 5 Disorder points (or 6 for a large unit) it falls into disarray. This may be recovered from but failure to do so could result in stands being removed or the entire contingent fleeing.
In the test game both Exeter and the King’s forces advanced rapidly upon each other (due to Exeter disregarding his hold orders) and swiftly came to close range. Gloucester’s battle was delayed, as he initially disobeyed his orders to attack. When he did come within bow range his Midland levies took heavy casualties (i.e. acquired lots of Disorder points) and halted. The short range archery duel between the King and Exeter was murderous with large amounts of Disorder being heaped on both sides. Luckily, Edward’s higher command rating meant his troops could recover quicker – although the King was wounded in the process (a hazard of rallying whilst close to the enemy).
Eventually, Edward’s troops charged forwards. In the resulting melee Exeter’s troops acquired enough Disorder points to become disarrayed. In such a condition, the outcome of a second round of melee was predictable and the East Anglians fled.

Exeter's flight signals the end of the battle
I called a halt at that point, feeling that I had gained a good overview of the system. The verdict? Not bad; it’s difficult to tell from one game but the rules have definite potential and I’m keen to give them a proper go against an actual opponent.
Next up - For, Lords, To-morrow is a Busy Day

Winter of Discontent

OK, so it’s only autumn and the discontent is only really a niggle but the phrase seemed apposite. Yes we’re talking Wars of the Roses here. Now, as fellow Petains will be aware, I have a reasonably large WOTR collection in 10mm scale that I game with using Peter Pig’s ‘Bloody Barons’. However, for some time now, I’ve not been happy with the basing and have been considering a rebase. Don’t get me wrong, there’s absolutely nothing wrong with the style of basing or the base dimensions, in fact I rather like the Peter Pig style square bases, no it’s the actual basing material / colours that I don’t like. The main problem is that the bases have a sort of camouflage effect that obscures the figures and with my ageing eyes I really need the figures to ‘pop’. I have actually bought some replacement bases but I just haven’t settled on an alternative basing scheme yet.

10mm troops - I know the photo is blurry but then again so are my eyes!

Anyway that’s just a long winded way of saying that a WOTR project has been at the back of my mind for some time now. As it happens a fellow member of ‘the other club’ also has a 10mm WOTR collection, currently unpainted, but has never settled on a set of rules. Whilst I really like Bloody Barons, they’re far from perfect and I have ‘tweaked’ them to better reflect my preconceptions. They do give a cracking game though and they have been very popular at the club. Are they just that though – a game? How well do they reflect the warfare of the time? To be honest, I’m not sure and ultimately I’m not even convinced that the question can even be answered. However, I do fancy taking a fresh look at the period and re-examining some of my own preconceptions. Somewhere, buried in the depths of my war room (aka the garage) I have a notebook containing my thoughts and ideas on the period but this may be a better way of recording the project. I also know that some of the Petains are ardent medievalists so hopefully this will serve as a source of useful discussion points – even if only carried out in the pub.
So first off I want to look at some alternative rule systems. For the purposes of this exercise, or at least to begin with, I shall restrict this study to rules that are period specific. At the moment I have copies of Poleaxed 2, Bloody Barons, Tree of Battles, and Coat of Steel plus I have borrowed a copy of, the snappily titled, ‘For Lords, Tomorrow is a Busy Day’. I’m sure other rule systems are available but this selection will be more than enough to begin with.

Poleaxed 2, Pat McGill and Dave Lanchester, 2001

“For, Lords, To-morrow is a Busy Day”, Keith John Warren, 2001


Bloody Barons, RFCM, 2005

A Coat of Steel, Perfect Captain, 2010

The Tree of Battles, Simon MacDowall, 2012